Your Badge Deserves Better: Three Beaded Lanyards You Can Make This Weekend
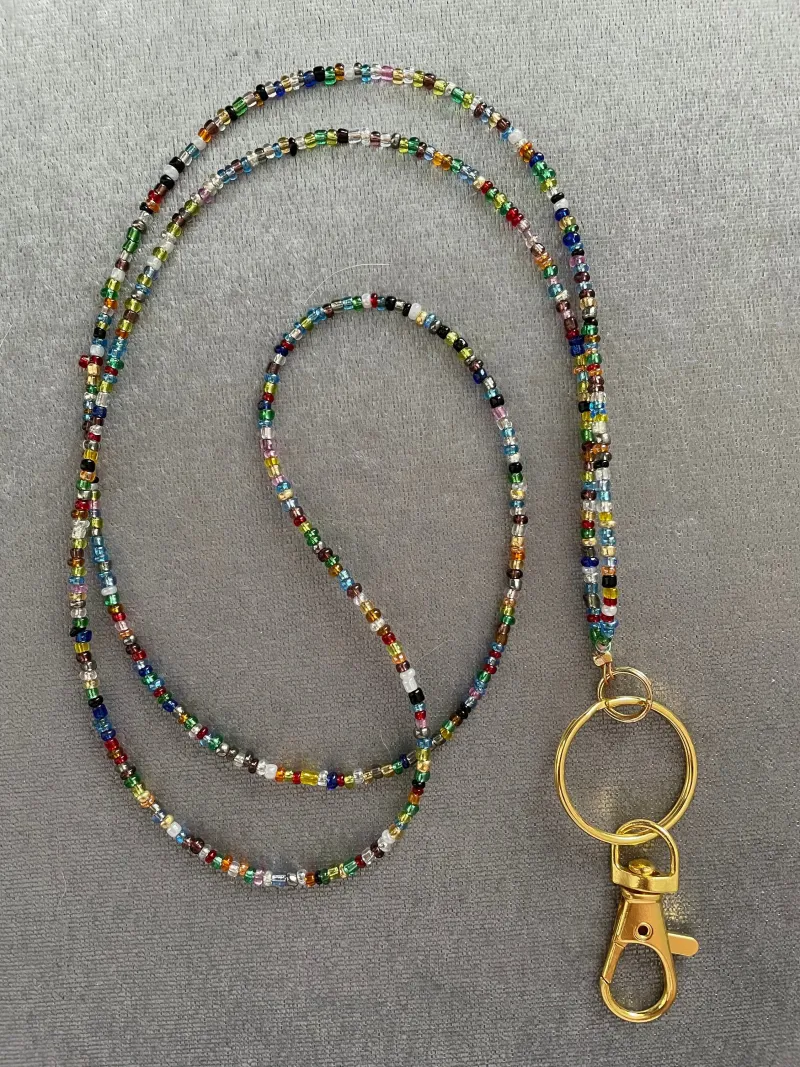
Photo: colorful beaded lanyard with ID badge handmade glass beads, via i.pinimg.com
Let's talk about the accessory you wear more than any other. Not your favorite hoops. Not the layered necklaces you save for date night. I'm talking about the lanyard — the thing holding your work badge, your gym scan card, your kid's school pickup tag, maybe all three on a busy Tuesday.
For a lot of us, remote and hybrid work turned the lanyard into our de facto daily necklace. And if you're going to wear something around your neck five days a week, it should make you a little happy when you catch it in the mirror. Mine gets compliments at coffee shops constantly, and every single one feels earned, because I strung it myself on a Sunday afternoon.
Here's the good news: a beaded lanyard is one of the most forgiving projects in the whole jewelry-making world. There's no sizing stress, no clasp gymnastics — you're basically making a very long, very pretty rope. Below are three designs, one for every skill level, plus the one piece of hardware you absolutely cannot skip.
First, the Non-Negotiable: Breakaway Hardware
Before we string a single bead, let's get serious for a second. A lanyard hangs around your neck near doors, machinery, and toddlers with a firm grip on everything. That's why every proper lanyard uses a breakaway clasp — a small plastic connector (the most common kind is the screw-together barrel type) that pops apart under a solid tug. You can find them at craft stores and online for pennies apiece, usually sold in packs of ten or twenty.
Search for "breakaway lanyard connectors" and grab the ones rated for actual lanyard use, not just kids' craft supplies. Screw the two halves together through your finished ends, and you've got a necklace that releases safely if it ever gets caught. This is the one place I'll tell you not to improvise.
You'll also want:
- Sturdy stringing material — 0.014" to 0.019" flexible beading wire works beautifully and holds up to daily wear
- Crimp tubes and crimping pliers for clean, secure ends
- A beading mat so your design doesn't roll off the kitchen table mid-layout
- A small key ring or badge clip for the business end
Design One: The Beginner's Confidence Builder
If you can slide beads onto wire, you can make this one. It's the lanyard I recommend to anyone who says they're "not crafty."
Pick three colors that live happily together — I love a matte gold glass round with cream and terracotta accents for fall, or turquoise and coral for summer. Then just repeat a simple rhythm: one focal bead, two spacers, repeat. That's it. That's the pattern.
Aim for a finished length of about 32 to 34 inches so it slips over your head without a clasp. Lay the whole thing out on your mat before crimping, step back, and squint at it. If the rhythm looks even, crimp both ends, attach your breakaway connector and badge clip, and you're done in under an hour.
Design Two: The Seed Bead Stripe
Ready for a little more pattern play? Seed beads let you work with color the way a painter works with a palette, and stripes are the friendliest way in.
Here's my formula: choose four colors, and string them in a repeating sequence like A-A-B-C, A-A-B-C. Because seed beads are tiny, you'll want to work in short sections — string about six inches of pattern, hold it up, check the flow, keep going. The result is a lanyard that reads as a smooth band of woven color from a distance, and rewards anyone who leans in close.
One tip from my own learning curve: seed beads have slightly rounded holes, so give your wire a gentle tug test every few inches to make sure nothing is strung at a weird angle. A final pass of wire through the whole strand before crimping tightens everything into a clean, professional column.
Design Three: The Statement Lanyard
This is the one that gets stopped in hallways. It borrows the logic of a chunky statement necklace and applies it to badge-wearing life.
Start with a few genuinely gorgeous beads — large-hole glass, ceramic, or even repurposed beads from a thrifted necklace. Cluster three to five of them near the bottom center of the lanyard, right around where your badge hangs, so the focal point frames your ID like a pendant. Flank the cluster with gradually smaller beads on each side, then taper into simple spacers for the rest of the strand.
Because this design has real visual weight, keep the breakaway connector and use your sturdiest wire. And honestly? It photographs beautifully, which matters more than I expected once I started actually wearing mine on video calls.
The Part Nobody Expects: It's a Conversation Starter
I went into this project thinking a beaded lanyard was a small upgrade. What I didn't anticipate was how often it starts conversations — coworkers asking where I bought it, the barista wanting to know if I sell them, a fellow parent at pickup asking for the pattern. There's something about functional jewelry that makes people braver about asking questions.
Which means these also make excellent handmade gifts. Teacher appreciation week, new-hire welcome baskets, stocking stuffers — a lanyard in someone's favorite colors costs maybe eight dollars in materials and takes an evening to make.
So dig into your stash, grab a pack of breakaway connectors, and give your badge the upgrade it's been quietly waiting for. String, sparkle, repeat — even on the days the sparkle is holding your ID.